
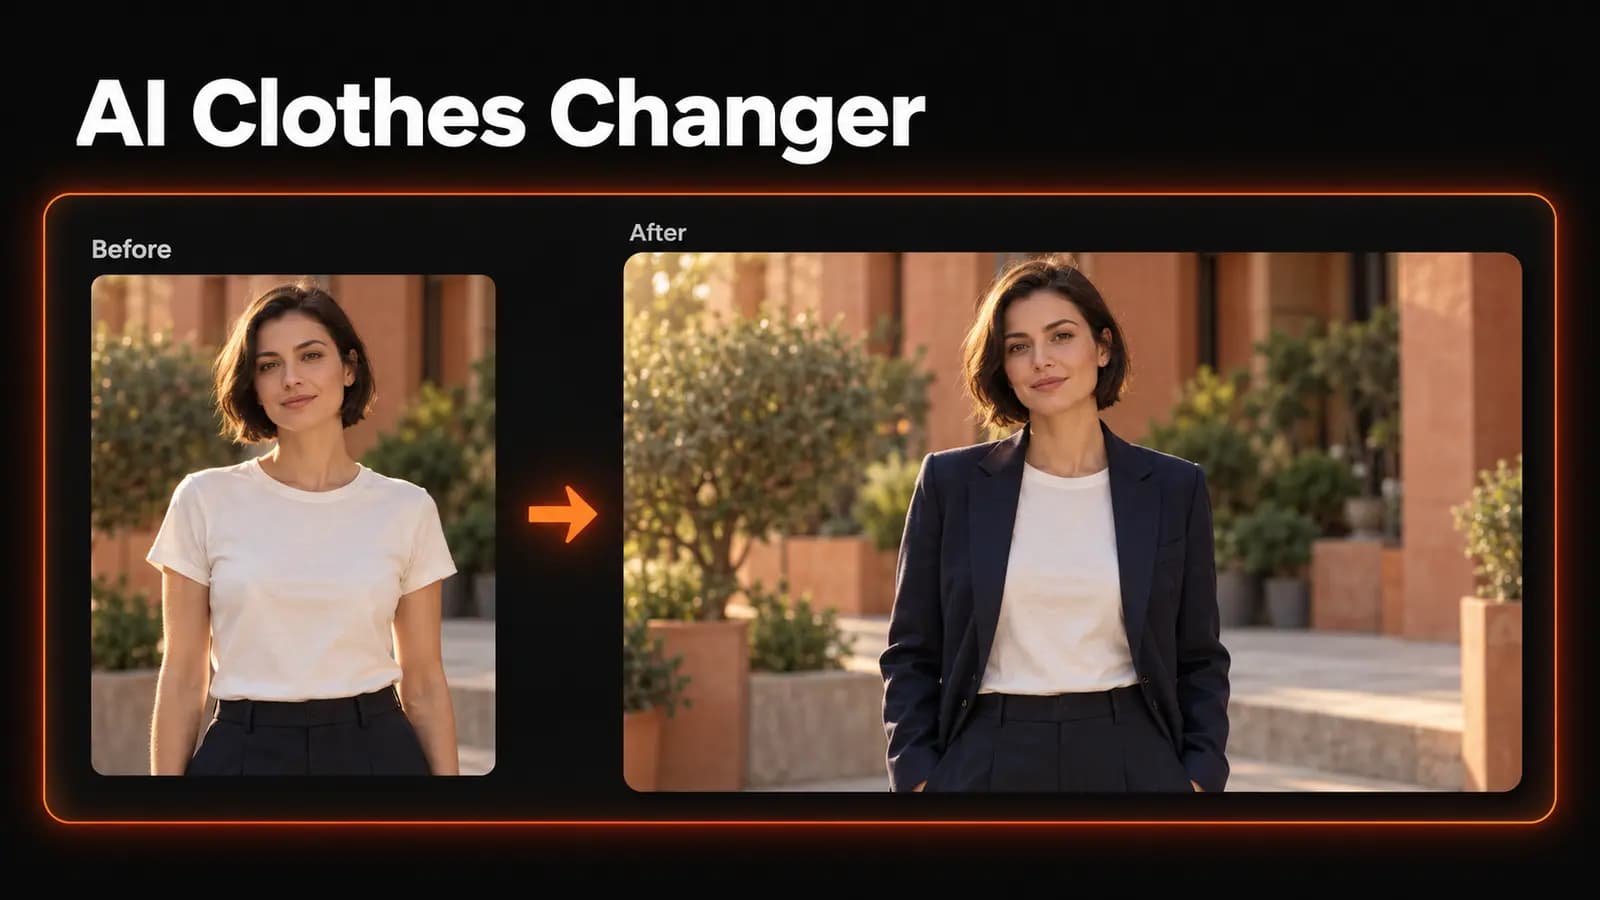
Un blazer que flota por encima de tus hombros no te sirve de nada cuando intentas decidir qué ponerte. Un buen prompt para cambiar ropa con IA tiene que describir cómo te queda la prenda y, al mismo tiempo, decirle al modelo qué no debe tocar.
Estos 15 prompts abarcan prendas superiores de uso diario, ropa de trabajo y conjuntos con telas más difíciles de recrear. Úsalos como punto de partida para editar fotos y luego compara el resultado con tu original: pedir que la cara o el cuerpo no cambien no garantiza que así sea.
Empieza con una foto en la que la ropa se vea bien
Elige una foto nítida de una sola persona, con luz uniforme y espacio suficiente alrededor de la prenda que quieres cambiar. Un retrato de la cintura para arriba sirve para una camisa; para pantalones y vestidos largos necesitas una foto que muestre la parte de las piernas que corresponda y el dobladillo de la prenda. Usa una imagen tuya o una que tengas permiso para editar.
En el primer intento, separa un poco los brazos del torso y aparta bolsos o el pelo largo de la ropa. Los brazos cruzados, un teléfono delante del pecho o un abrigo que tape la cintura dejan buena parte del nuevo conjunto a la interpretación del modelo. Si la foto tiene muchos filtros, empieza de nuevo con la versión sin filtrar.
Antes de subirla, decide qué quieres comparar. Para comparar colores de camisa, mantén el corte y la tela; para comparar siluetas, deja fijo el color. De lo contrario, un cambio de luz o de estilo puede distraerte de lo que de verdad estás evaluando: la prenda.
Prepara todo para cambiar ropa con IA
En LoveImage, empieza con Imagen a imagen (Image to Image) para editar a partir de una referencia. Para seguir estos pasos, necesitas una cuenta con el correo electrónico verificado y un plan de pago: el plan Gratis no incluye los modelos de edición con referencia que se usan aquí.
- Entra al espacio de trabajo y sube tu foto como imagen de referencia.
- Selecciona un modelo compatible. Nano Banana 2 acepta imágenes de referencia y ofrece resoluciones de 1K, 2K y 4K; empieza en 1K mientras decides el conjunto.
- Elige un encuadre que coincida con tu foto y pega uno de los prompts de ropa que encontrarás más abajo junto con la instrucción que aparece a continuación para conservar el resto de la imagen.
- Revisa el costo en créditos que se muestra, haz clic en Generar imagen y compara el resultado con tu original al mismo nivel de zoom.
El espacio de trabajo admite una sola imagen de referencia, así que usa tu retrato y describe con palabras la prenda nueva. Con este método no puedes subir también una foto del producto. Usa la descripción para orientar el estilo, ya que no permite reproducir con exactitud el artículo de una tienda.
Añade esta instrucción a cada prompt:
Edit only the specified clothing on the person in the reference photo. Preserve their face, hair, skin tone, body proportions, pose, hands, background, camera angle, and light direction. Keep all clothing and accessories not mentioned unchanged.
Usa esa instrucción con un solo prompt cada vez. Guarda una copia intacta de la foto original para volver a empezar si las ediciones sucesivas van cambiando tu apariencia.
Prompts 1–5: prendas superiores y combinaciones en capas para el día a día
Empieza con un cambio de ropa fácil de evaluar. Los colores lisos permiten detectar problemas en costuras, mangas y sombreado de la tela antes de pasar a los estampados.
1. Camiseta lisa de algodón
Replace the current top with an ivory cotton crew-neck T-shirt in a regular fit. Show a matte jersey texture, shoulder seams at the shoulders, and small folds where the sleeves meet the upper arms. Keep the hem untucked, resting naturally over the waistband.
2. Camisa de lino holgada
Change the top to a sage green linen button-up shirt with an open collar and sleeves ending at the wrists. Give the fabric a visible fine weave and irregular creases around the elbows and waist. Keep the shirt relaxed without changing the person's torso shape.
3. Chaqueta de mezclilla oscura
Add an unbuttoned dark indigo denim jacket over the existing top. Use structured seams, two chest pockets, and subtle fading along the edges. Let the jacket stand slightly away from the torso, with believable thickness at the collar and cuffs.
4. Suéter de punto fino
Replace the top with a burgundy fine-knit merino crew-neck sweater. Show small knit stitches, ribbed cuffs, and a softly draped waist without adding bulk to the body. Keep the fabric matte, with folds following the existing arm position.
5. Sudadera amplia con capucha
Change the top to a washed charcoal pullover hoodie with dropped shoulders and a kangaroo pocket. Give it heavyweight cotton volume, deep folds at the elbows, and a hood resting behind the neck. Let the loose silhouette come from the garment, without widening the person's body.
Prompts 6–10: sastrería y ropa de trabajo
La ropa de sastrería te da detalles concretos que revisar: dónde caen los hombros, la forma del cuello, la altura de la cintura y dónde terminan los dobladillos. Si una chaqueta solo se ve convincente porque el modelo te afinó la cintura o te enderezó la postura, vuelve a la imagen original.
6. Blazer azul marino para entrevista
Add a navy single-breasted wool blazer over the existing top, worn open. Place the shoulder seams at the natural shoulders and the cuffs at the wrists. Show narrow notch lapels, subtle wool texture, and soft shadows where the jacket overlaps the top.
7. Camisa Oxford blanca
Replace the current top with a white cotton Oxford shirt, with the collar button open and sleeves down. Retain visible fabric texture in the bright areas. Add small tension folds around the elbows and buttons without making the shirt look stretched across the chest.
8. Pantalón de pierna recta
Replace the trousers with charcoal straight-leg wool trousers at the existing waist height. Keep the hips and leg positions unchanged, with vertical creases following each leg. Let the hems meet the tops of the existing shoes with a slight fabric break.
9. Gabardina beige
Add an open beige cotton-gabardine trench coat over the current outfit, ending just below the knees. Show substantial lapels and a belt hanging loosely at the sides. Keep the visible clothing underneath, and add contact shadows where the coat overlaps the arms.
10. Traje de lino desestructurado
Replace the jacket and trousers with a matching sand-colored linen suit, keeping the existing shirt and shoes. Use a softly structured jacket and straight trousers with natural creasing. Preserve the person's stance and body shape, including any asymmetry in their shoulders.
Prompts 11–15: vestidos, texturas y estampados
Para estas ediciones, elige una foto de referencia que muestre toda la zona que ocupará la prenda. El satén, los plisados y las rayas te ayudan a comprobar si la tela generada se adapta a las formas del cuerpo o simplemente lo cubre con una superficie plana.
11. Vestido midi de crepé mate
Replace the outfit with a forest green, short-sleeved crepe midi dress with a round neckline and gently defined waist. Use an opaque matte fabric and a skirt falling below the knees. Let the drape follow the existing posture without tightening or reshaping the body.
12. Vestido de noche de satén
Change the outfit to a midnight blue satin midi dress with long sleeves and a modest boat neckline. Show broad, soft highlights following the fabric folds, consistent with the original light source. Avoid a metallic finish, and keep the waist and hip proportions unchanged.
13. Falda plisada
Replace the lower garment with a dark brown pleated midi skirt, keeping the top and shoes. Begin the pleats at the existing waistline and let them open naturally over the hips. Make their spacing change with the body angle, with shadows inside the folds.
14. Camisa de algodón a rayas
Replace the top with a blue-and-white vertically striped cotton shirt in a regular fit. Let the stripes bend around fabric folds and follow the sleeves, with plausible joins at the seams. Keep a straight button placket and avoid melting or duplicated buttons.
15. Chaqueta de gamuza
Add an unzipped tobacco-brown suede jacket over the existing top. Show a fine, softly varied nap, a substantial collar, and gentle shading around the elbows. Keep the surface matte rather than glossy, with realistic thickness along the zipper opening.
Corrige el detalle que delata la edición
Compara primero tu cara y tu cuerpo con los de la foto original, y después la ropa. Fíjate en el contorno de la mandíbula, el ancho de los hombros, las manos y la posición de las piernas: un buen conjunto no compensa un cambio no deseado en tu apariencia. Si esas zonas se alteran, vuelve a empezar desde el original y simplifica las instrucciones sobre la ropa.
Si la tela parece pintada sobre el cuerpo, describe su grosor y la separación entre la prenda y el cuerpo: «leave a small gap between the jacket and torso» o «add a contact shadow below the collar». Si la tela parece plástico, pide una superficie mate y que se aprecie la trama del tejido. Respeta la luz de la foto original en lugar de añadir «studio lighting» a una foto tomada en exteriores.
Revisa a tamaño completo los puños, los botones, las aberturas de los bolsillos y los dobladillos. Pide una sola corrección por intento para evaluar si mejoró el resultado. Editor de fotos con IA (Photo Editor) permite hacer ajustes mediante prompts y es otra opción para editar a partir de una referencia, pero también exige revisar cada resultado.
Usa el resultado para juzgar el estilo, no la talla
Un conjunto generado puede ayudarte a comparar un color, una silueta o una combinación. No puede decirte si una prenda real te quedará apretada en los hombros o si se ajustará bien a tu cintura.
Si estás pensando en comprar la prenda, revisa sus medidas y su confección por separado. Para decidir si te gusta el estilo, coloca tu foto original junto a la versión editada y pregúntate si la ropa es el único cambio relevante.
Abre Imagen a imagen de LoveImage, sube una foto nítida y prueba un prompt de ropa junto con la instrucción para conservar el resto de la imagen. Revisa la cara, las costuras y la tela antes de probar el siguiente conjunto.