
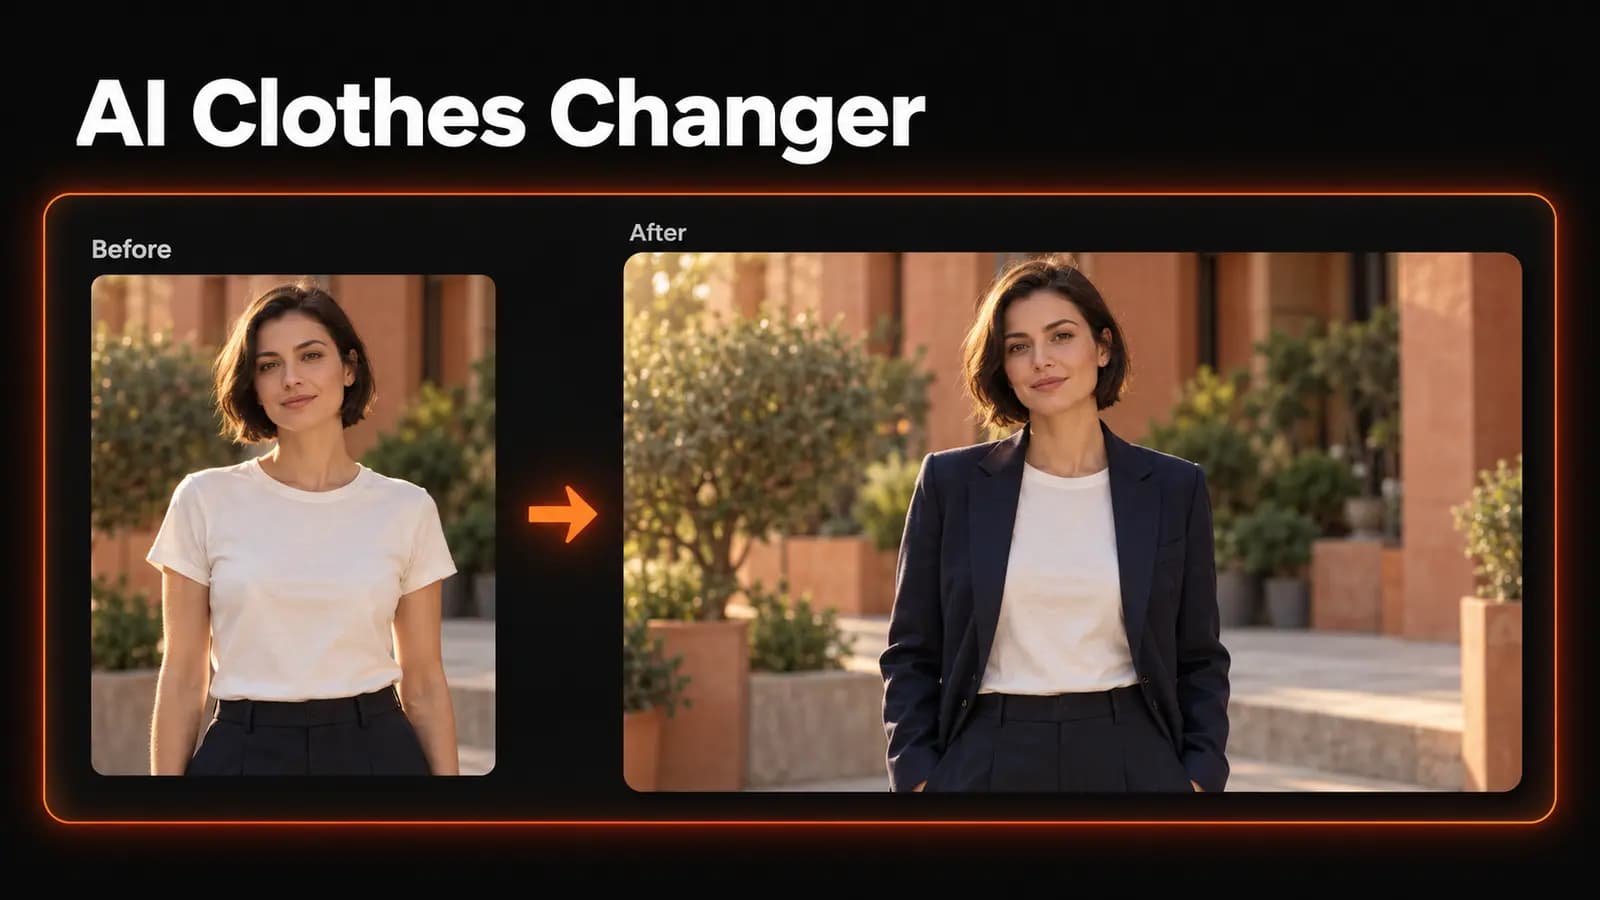
肩から浮いて見えるブレザーでは、何を着るか決める参考になりません。AIで服を着せ替えるには、服が体にどうフィットするかをプロンプトで具体的に伝え、変えずに残したい部分も指定する必要があります。
ここでは、普段使いのトップスから仕事着、質感の再現が難しい生地の服まで、15のプロンプトを紹介します。写真を編集する際のたたき台として使い、仕上がりを元の写真と見比べてください。顔や体型を変えないよう指示しても、必ずそのまま保たれるとは限りません。
服がはっきり写った写真から始める
人物が1人だけ写った、ピントの合った鮮明な写真を選びましょう。光が均一で、着せ替えたい服の周りに余白があるものが向いています。シャツなら腰から上のポートレートで十分ですが、パンツやロングドレスなら、脚や裾まで写った写真が必要です。自分の画像か、編集の許可を得た画像を使ってください。
最初は、腕を胴体から少し離し、バッグや長い髪が服にかからないようにしておきましょう。腕を組んでいたり、スマートフォンで胸元が隠れていたり、コートでウエストが見えなかったりすると、着せ替え後の服をモデルが推測で補う部分が増えます。元の写真に強いフィルターがかかっているなら、フィルターなしの写真でやり直してください。
アップロードする前に、何を比べたいのかを決めておきます。シャツの色を比べるなら形と生地を固定し、シルエットを比べるなら色を固定します。そうしないと、光やスタイリングの変化に気を取られて、服そのものを判断しにくくなります。
AI着せ替えの準備と手順
LoveImageでは、参照画像をもとに編集できる「画像から画像」(Image to Image)から始めます。この方法で編集するには、メール認証済みのアカウントと有料プランが必要です。Freeプランで選べるモデルには、ここで使う参照画像をもとに編集するモデルが含まれていません。
- ワークスペースに進み、自分の写真を参照画像としてアップロードします。
- 対応するモデルを選びます。Nano Banana 2 は参照画像の入力に対応し、1K、2K、4Kの出力設定があります。服を決めるまでは1Kで試しましょう。
- 元の写真に合った構図の設定を選び、下に掲載した服のプロンプトからひとつ選んで、服以外を変えないための指示と一緒に貼り付けます。
- 表示される消費クレジット数を確認して 画像を生成 をクリックし、結果を元の写真と同じ倍率で見比べます。
ワークスペースで使える参照画像は1枚なので、自分のポートレートを使い、着せ替えたい服は言葉で説明します。この方法では、人物の写真に加えて商品の写真をアップロードすることはできません。言葉での説明だけではショップの商品を正確に再現できないため、説明文はスタイリングの希望を伝えるものと考えましょう。
各プロンプトに次の指示を加えてください:
Edit only the specified clothing on the person in the reference photo. Preserve their face, hair, skin tone, body proportions, pose, hands, background, camera angle, and light direction. Keep all clothing and accessories not mentioned unchanged.
この指示は、毎回ひとつのプロンプトと組み合わせて使います。編集を重ねるうちに見た目が変わってしまったときにやり直せるよう、手を加えていない元の写真を保存しておきましょう。
プロンプト1〜5:普段使いのトップスと重ね着
まずは仕上がりを判断しやすい着せ替えから始めましょう。柄物を試す前に無地の服を使うと、縫い目や袖、生地の陰影の不自然さを見つけやすくなります。
1. 無地のコットンTシャツ
Replace the current top with an ivory cotton crew-neck T-shirt in a regular fit. Show a matte jersey texture, shoulder seams at the shoulders, and small folds where the sleeves meet the upper arms. Keep the hem untucked, resting naturally over the waistband.
2. ゆったりしたリネンシャツ
Change the top to a sage green linen button-up shirt with an open collar and sleeves ending at the wrists. Give the fabric a visible fine weave and irregular creases around the elbows and waist. Keep the shirt relaxed without changing the person's torso shape.
3. ダークデニムジャケット
Add an unbuttoned dark indigo denim jacket over the existing top. Use structured seams, two chest pockets, and subtle fading along the edges. Let the jacket stand slightly away from the torso, with believable thickness at the collar and cuffs.
4. ハイゲージのニット
Replace the top with a burgundy fine-knit merino crew-neck sweater. Show small knit stitches, ribbed cuffs, and a softly draped waist without adding bulk to the body. Keep the fabric matte, with folds following the existing arm position.
5. オーバーサイズのパーカー
Change the top to a washed charcoal pullover hoodie with dropped shoulders and a kangaroo pocket. Give it heavyweight cotton volume, deep folds at the elbows, and a hood resting behind the neck. Let the loose silhouette come from the garment, without widening the person's body.
プロンプト6〜10:テーラードと仕事着
テーラードの服は、肩の位置、襟の形、ウエストの高さ、裾の位置を確認しましょう。モデルがウエストを細くしたり姿勢をまっすぐに補正したりした結果、ジャケットが自然に見えているだけなら、元の画像に戻ってやり直してください。
6. 面接向けのネイビーブレザー
Add a navy single-breasted wool blazer over the existing top, worn open. Place the shoulder seams at the natural shoulders and the cuffs at the wrists. Show narrow notch lapels, subtle wool texture, and soft shadows where the jacket overlaps the top.
7. 白のオックスフォードシャツ
Replace the current top with a white cotton Oxford shirt, with the collar button open and sleeves down. Retain visible fabric texture in the bright areas. Add small tension folds around the elbows and buttons without making the shirt look stretched across the chest.
8. ストレートパンツ
Replace the trousers with charcoal straight-leg wool trousers at the existing waist height. Keep the hips and leg positions unchanged, with vertical creases following each leg. Let the hems meet the tops of the existing shoes with a slight fabric break.
9. ベージュのトレンチコート
Add an open beige cotton-gabardine trench coat over the current outfit, ending just below the knees. Show substantial lapels and a belt hanging loosely at the sides. Keep the visible clothing underneath, and add contact shadows where the coat overlaps the arms.
10. アンコンのリネンスーツ
Replace the jacket and trousers with a matching sand-colored linen suit, keeping the existing shirt and shoes. Use a softly structured jacket and straight trousers with natural creasing. Preserve the person's stance and body shape, including any asymmetry in their shoulders.
プロンプト11〜15:ドレス、質感、柄
これらの編集には、着せ替えたい服の範囲がすべて写った参照画像を選んでください。サテン、プリーツ、ストライプは、生成された生地が体に沿っているのか、平らな面をかぶせただけなのかを見分ける手がかりになります。
11. マットなクレープ素材のミディドレス
Replace the outfit with a forest green, short-sleeved crepe midi dress with a round neckline and gently defined waist. Use an opaque matte fabric and a skirt falling below the knees. Let the drape follow the existing posture without tightening or reshaping the body.
12. サテンのイブニングドレス
Change the outfit to a midnight blue satin midi dress with long sleeves and a modest boat neckline. Show broad, soft highlights following the fabric folds, consistent with the original light source. Avoid a metallic finish, and keep the waist and hip proportions unchanged.
13. プリーツスカート
Replace the lower garment with a dark brown pleated midi skirt, keeping the top and shoes. Begin the pleats at the existing waistline and let them open naturally over the hips. Make their spacing change with the body angle, with shadows inside the folds.
14. ストライプのコットンシャツ
Replace the top with a blue-and-white vertically striped cotton shirt in a regular fit. Let the stripes bend around fabric folds and follow the sleeves, with plausible joins at the seams. Keep a straight button placket and avoid melting or duplicated buttons.
15. スエードジャケット
Add an unzipped tobacco-brown suede jacket over the existing top. Show a fine, softly varied nap, a substantial collar, and gentle shading around the elbows. Keep the surface matte rather than glossy, with realistic thickness along the zipper opening.
違和感のもとになる細部を直す
まず顔と体を比べ、それから服を見ます。あごのライン、肩幅、手、脚の位置をチェックしましょう。服の仕上がりがよくても、人物に意図しない変化があれば見過ごせません。こうした部分が変わっていたら、服についての指示をシンプルにして、元の写真からやり直しましょう。
服が体に描きつけられたように見えるなら、生地の厚みや体との隙間を具体的に指定します。たとえば「leave a small gap between the jacket and torso」や「add a contact shadow below the collar」と書き加えます。生地がプラスチックのように見えるなら、光沢のない表面と、織り目が見える質感を指定しましょう。屋外の写真に「studio lighting」という指示を加えるのではなく、元の写真の光に合わせます。
袖口、ボタン、ポケットの開き口、裾は等倍で確認します。修正の効果を判断しやすいように、1回に指示する修正はひとつに絞りましょう。プロンプトで調整できる「AI写真編集」(Photo Editor)でも参照画像をもとに編集できますが、どちらを使っても仕上がりの確認は毎回必要です。
結果はサイズではなく、スタイルの判断に使う
生成されたコーディネートは、色やシルエット、組み合わせを比べるのに役立ちます。けれども、実際の服が肩でつっぱるか、ウエストが合うかまではわかりません。
購入するかどうかを決める際は、服の寸法や仕立てを別途確認してください。着こなしを判断する際は、元の写真と編集後の画像を並べ、服以外に大きな変化がないかを確かめましょう。
LoveImageの「画像から画像」を開いて鮮明な写真をアップロードし、服のプロンプトをひとつ選んで、服以外を変えないための指示と一緒に試してみてください。次のスタイルに進む前に、顔、縫い目、生地をチェックしましょう。