
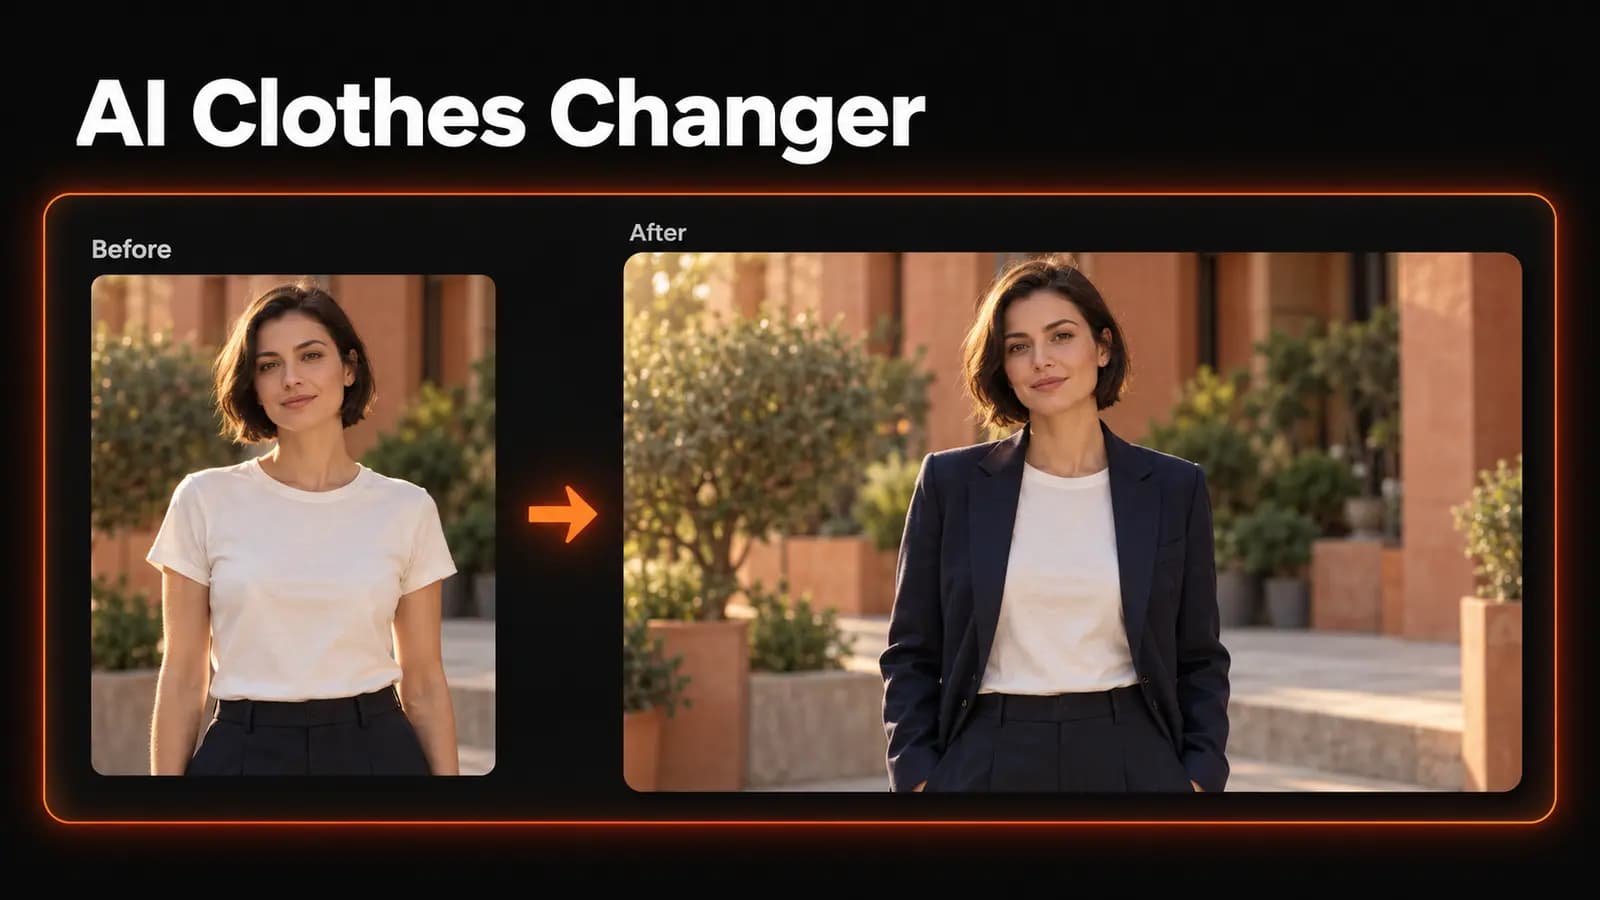
A blazer that floats above your shoulders is no help when you're deciding what to wear. A useful AI clothes changer prompt needs to describe how the garment sits on you, while telling the model what to leave alone.
These 15 prompts cover everyday tops, workwear, and outfits with trickier fabrics. Use them as starting points for photo edits, then check the result against your original; requesting an unchanged face or body doesn't guarantee one.
Start with a photo that shows the clothes clearly
Choose a sharp photo of one person, with even light and enough space around the garment you want to change. A waist-up portrait works for a shirt; trousers and long dresses need a photo that includes the relevant legs and hemline. Use your own image or one you have permission to edit.
For a first attempt, keep arms slightly away from the torso and move bags or long hair away from the clothing. Crossed arms, a phone covering the chest, or a coat hiding the waist leave more of the replacement outfit to interpretation. If the source is heavily filtered, start again with the unfiltered photo.
Decide what you're comparing before you upload. To compare shirt colors, keep the cut and fabric fixed; to compare silhouettes, hold the color steady. Otherwise, a change in lighting or styling can distract you from the clothing choice.
Set up your AI clothes changer workflow
In LoveImage, start with Image to Image for reference-based edits. This workflow requires an account with a verified email and a paid plan: the free plan's model selection does not include the reference-editing models used here.
- Continue into the workspace and upload your photo as the reference image.
- Select a compatible model. Nano Banana 2 accepts reference input and offers 1K, 2K, and 4K output settings; start at 1K while deciding on the outfit.
- Choose a framing option that matches your source, and paste one clothing prompt below with the preservation instruction that follows.
- Review the displayed credit cost, click Generate image, and compare the result with your original at the same zoom level.
The workspace takes one reference image, so use your portrait and describe the new garment in words. You can't add a separate product photo alongside it in this workflow. Treat the description as a styling brief, since it won't establish an exact match to a retailer's item.
Add this instruction to each prompt:
Edit only the specified clothing on the person in the reference photo. Preserve their face, hair, skin tone, body proportions, pose, hands, background, camera angle, and light direction. Keep all clothing and accessories not mentioned unchanged.
Use that instruction with one prompt at a time. Keep an untouched copy of the source photo so you can restart if successive edits change your appearance.
Prompts 1–5: everyday tops and layers
Begin with an outfit change you can judge easily. Solid colors make it easier to spot problems with seams, sleeves, and fabric shading before you introduce a pattern.
1. Plain cotton T-shirt
Replace the current top with an ivory cotton crew-neck T-shirt in a regular fit. Show a matte jersey texture, shoulder seams at the shoulders, and small folds where the sleeves meet the upper arms. Keep the hem untucked, resting naturally over the waistband.
2. Relaxed linen shirt
Change the top to a sage green linen button-up shirt with an open collar and sleeves ending at the wrists. Give the fabric a visible fine weave and irregular creases around the elbows and waist. Keep the shirt relaxed without changing the person's torso shape.
3. Dark denim jacket
Add an unbuttoned dark indigo denim jacket over the existing top. Use structured seams, two chest pockets, and subtle fading along the edges. Let the jacket stand slightly away from the torso, with believable thickness at the collar and cuffs.
4. Fine-knit sweater
Replace the top with a burgundy fine-knit merino crew-neck sweater. Show small knit stitches, ribbed cuffs, and a softly draped waist without adding bulk to the body. Keep the fabric matte, with folds following the existing arm position.
5. Oversized hoodie
Change the top to a washed charcoal pullover hoodie with dropped shoulders and a kangaroo pocket. Give it heavyweight cotton volume, deep folds at the elbows, and a hood resting behind the neck. Let the loose silhouette come from the garment, without widening the person's body.
Prompts 6–10: tailoring and workwear
Tailored clothes give you specific details to check: shoulder placement, collar shape, waist height, and where hems end. If a jacket looks convincing only because the model has narrowed your waist or straightened your pose, return to the original image.
6. Navy interview blazer
Add a navy single-breasted wool blazer over the existing top, worn open. Place the shoulder seams at the natural shoulders and the cuffs at the wrists. Show narrow notch lapels, subtle wool texture, and soft shadows where the jacket overlaps the top.
7. White Oxford shirt
Replace the current top with a white cotton Oxford shirt, with the collar button open and sleeves down. Retain visible fabric texture in the bright areas. Add small tension folds around the elbows and buttons without making the shirt look stretched across the chest.
8. Straight-leg trousers
Replace the trousers with charcoal straight-leg wool trousers at the existing waist height. Keep the hips and leg positions unchanged, with vertical creases following each leg. Let the hems meet the tops of the existing shoes with a slight fabric break.
9. Beige trench coat
Add an open beige cotton-gabardine trench coat over the current outfit, ending just below the knees. Show substantial lapels and a belt hanging loosely at the sides. Keep the visible clothing underneath, and add contact shadows where the coat overlaps the arms.
10. Unstructured linen suit
Replace the jacket and trousers with a matching sand-colored linen suit, keeping the existing shirt and shoes. Use a softly structured jacket and straight trousers with natural creasing. Preserve the person's stance and body shape, including any asymmetry in their shoulders.
Prompts 11–15: dresses, texture, and pattern
Choose a reference with the whole garment area visible for these edits. Satin, pleats, and stripes give you useful clues about whether the generated fabric follows the body or merely covers it with a flat surface.
11. Matte crepe midi dress
Replace the outfit with a forest green, short-sleeved crepe midi dress with a round neckline and gently defined waist. Use an opaque matte fabric and a skirt falling below the knees. Let the drape follow the existing posture without tightening or reshaping the body.
12. Satin evening dress
Change the outfit to a midnight blue satin midi dress with long sleeves and a modest boat neckline. Show broad, soft highlights following the fabric folds, consistent with the original light source. Avoid a metallic finish, and keep the waist and hip proportions unchanged.
13. Pleated skirt
Replace the lower garment with a dark brown pleated midi skirt, keeping the top and shoes. Begin the pleats at the existing waistline and let them open naturally over the hips. Make their spacing change with the body angle, with shadows inside the folds.
14. Striped cotton shirt
Replace the top with a blue-and-white vertically striped cotton shirt in a regular fit. Let the stripes bend around fabric folds and follow the sleeves, with plausible joins at the seams. Keep a straight button placket and avoid melting or duplicated buttons.
15. Suede jacket
Add an unzipped tobacco-brown suede jacket over the existing top. Show a fine, softly varied nap, a substantial collar, and gentle shading around the elbows. Keep the surface matte rather than glossy, with realistic thickness along the zipper opening.
Fix the detail that gives the edit away
Compare your face and body first, then the clothes. Look at the jawline, shoulder width, hands, and leg position; a good outfit doesn't compensate for an unwanted change to the person. If those areas drift, restart from the original and simplify the clothing request.
For fabric that looks painted on, describe thickness and separation: “leave a small gap between the jacket and torso” or “add a contact shadow below the collar.” For plastic-looking cloth, specify a matte surface and visible weave. Match the source lighting rather than adding “studio lighting” to an outdoor photo.
Inspect cuffs, buttons, pocket openings, and hems at full size. Ask for one correction per attempt so you can judge whether it helped. Photo Editor for prompt-based adjustments is another reference-editing route, but it doesn't remove the need to check each result.
Use the result to judge style, not size
A generated outfit can help you compare a color, silhouette, or combination. It cannot tell you whether a real garment will pull at the shoulders or fit at the waist.
For a shopping decision, check the garment's measurements and construction separately. For a styling decision, keep your original photo beside the edit and ask whether the clothing is the only meaningful change.
Open LoveImage Image to Image, upload a clear photo, and try one outfit prompt with the preservation instruction. Check the face, seams, and fabric before trying the next look.